- Home
- App Development
- Blog Details
- 12 mins read
SwiftUI vs. UIKit: Key Differences and Comparison
- Published on:
- Written by:
- Share:
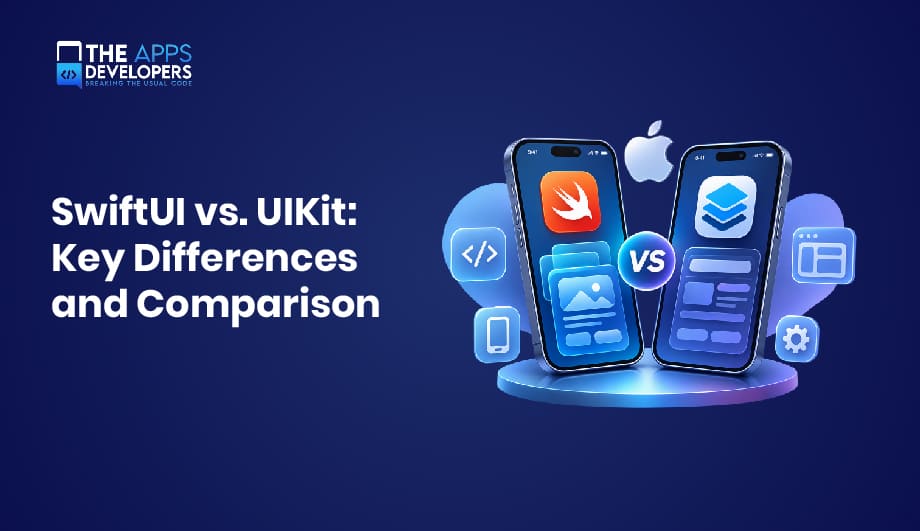
SwiftUI and UIKit are both Apple frameworks for building user interfaces. They differ in how you write UI code, how your interface responds to data changes, which OS versions you can support, and how they fit into existing projects. The core distinction is simple. SwiftUI is declarative: you describe what the interface should look like for a given state. UIKit is traditionally imperative: you create views and tell them how to change step by step.
Neither framework wins in every case. SwiftUI is usually the natural starting point for new apps with modern deployment targets. UIKit remains essential for large existing codebases and for some advanced interface work. Many production apps use both. If you are still mapping out the broader process, our guide on how to build an iOS app covers the stages around this decision.
What Is SwiftUI?
SwiftUI is Apple’s declarative framework for building interfaces across iOS, iPadOS, macOS, watchOS, tvOS, and visionOS. Apple introduced it in 2019 alongside iOS 13. You build interfaces by composing small, reusable views in Swift code. When the underlying data changes, the framework updates the screen automatically.
Swift and SwiftUI are different things. Swift is the programming language, and SwiftUI is a UI framework written for that language. UIKit apps are also commonly written in Swift, and older ones are often written in Objective-C. For more on the language side, see our breakdown of the best programming languages for iOS app development.
How Does SwiftUI Work?
In SwiftUI, a View is a lightweight value, usually a struct. Its body property describes the interface for the current state. You don’t modify the views on screen directly. Instead, you change state, and SwiftUI recomputes the affected parts of the view hierarchy.
A few property wrappers and types drive this behavior:
- @State stores local, view-owned values, such as whether a toggle is on.
- @Binding gives a child view read-write access to state owned by a parent.
- Observable models hold shared data. Since iOS 17, the @Observable macro from the Observation framework is the recommended approach. The older ObservableObject protocol supports earlier OS versions.
Here is a simple counter:
import SwiftUI
struct CounterView: View {
@State private var count = 0
var body: some View {
VStack(spacing: 16) {
Text(“Taps: \(count)”)
.font(.title)
Button(“Tap Me”) {
count += 1
}
}
}
}
The button’s action changes count and nothing else. Because the Text view reads count, SwiftUI re-renders the label automatically. The code never updates the label itself.
What Is UIKit?
UIKit is Apple’s established framework for building and managing interfaces on iOS, iPadOS, tvOS, visionOS, and Mac apps built with Mac Catalyst. It dates back to the original iPhone SDK, and it still powers a very large share of App Store apps.
UIKit uses an imperative, object-oriented model. You create view objects, place them in a hierarchy, and update their properties directly when something changes. Its API surface is broad and mature, with more than a decade of documentation, third-party libraries, and community knowledge behind it.
How Does UIKit Work?
UIKit apps are built from two core types:
- UIView is a rectangular area that draws content and responds to touches. Views nest inside one another to form a view hierarchy.
- UIViewController manages a screen’s views and handles lifecycle events such as viewDidLoad() and viewWillAppear(_:). It also coordinates user interaction.
Layout is handled through Auto Layout constraints, stack views, or manual frame calculations. Views are created in code or designed in Interface Builder using storyboards and XIB files. Events flow through patterns such as target-action, which connects a control event to a method, and delegation, where an object reports events to another object.
Here is the same counter in UIKit:
import UIKit
final class CounterViewController: UIViewController {
private var count = 0
private let label = UILabel()
private let button = UIButton(type: .system)
override func viewDidLoad() {
super.viewDidLoad()
view.backgroundColor = .systemBackground
label.text = “Taps: 0”
label.font = .preferredFont(forTextStyle: .title1)
button.setTitle(“Tap Me”, for: .normal)
button.addTarget(self, action: #selector(buttonTapped), for: .touchUpInside)
let stack = UIStackView(arrangedSubviews: [label, button])
stack.axis = .vertical
stack.spacing = 16
stack.alignment = .center
stack.translatesAutoresizingMaskIntoConstraints = false
view.addSubview(stack)
NSLayoutConstraint.activate([
stack.centerXAnchor.constraint(equalTo: view.centerXAnchor),
stack.centerYAnchor.constraint(equalTo: view.centerYAnchor)
])
}
@objc private func buttonTapped() {
count += 1
label.text = “Taps: \(count)”
}
}
The result looks the same, but the responsibilities differ. The controller creates the views, sets up constraints, wires up the event, and must remember to update label.text whenever count changes.
SwiftUI vs. UIKit: Quick Comparison
| Comparison Factor | SwiftUI | UIKit |
| Programming approach | Declarative | Imperative, object-oriented |
| UI construction | Composed value-type views and modifiers | UIView and UIViewController objects, in code or Interface Builder |
| State management | Built-in (@State, @Binding, Observation) | Developer-managed through delegation, target-action, Combine, or other patterns, with automatic Observation tracking in recent releases |
| Code structure | Typically fewer lines for standard UI | More explicit setup and update code |
| Development workflow | Live Xcode Previews, rapid iteration | Mature tooling, storyboards optional, previews available since Xcode 15 |
| Platform compatibility | iOS 13+, with many APIs requiring newer versions | Available across all supported iOS versions |
| UI customization | Simple for common designs, harder for unusual behavior | Detailed low-level control |
| Animations | State-driven, concise | Explicit APIs plus direct Core Animation access |
| Performance considerations | Depends on view identity and update scope | Depends on manual update efficiency and layout cost |
| Learning curve | Approachable syntax, subtle data-flow rules | Larger API surface, well-documented patterns |
| Testing and debugging | Abstraction can obscure update causes | Concrete object hierarchy is easier to inspect |
| Existing application integration | Embeds into UIKit through UIHostingController | Embeds into SwiftUI through representables |
| Maintenance considerations | Evolves quickly, so API availability varies by OS | Stable, but often more code to maintain |
Key Differences Between SwiftUI and UIKit
Declarative vs. Imperative Programming
Declarative code describes the desired result. Imperative code describes the steps to get there. Consider a “Submit” button that should be disabled until a form is valid.
In SwiftUI, you write .disabled(!form.isValid) once. The button stays correct whenever isValid changes. In UIKit, you set button.isEnabled in every place the form can change, such as each text field’s editing event. You can also centralize the update in a method that every change calls.
This affects much more than line count. In imperative code, bugs often come from views falling out of sync with data. A missed update path leaves stale UI on screen. Declarative code removes most of that category of bug. The new risk is in data flow: putting state in the wrong place, or triggering more view updates than intended.
UI Design and Layout
SwiftUI layouts come from nesting stacks, grids, and spacers, then refining them with modifiers. The framework negotiates sizes between parents and children automatically. That makes adaptive layouts across device sizes and Dynamic Type settings fairly natural to build.
UIKit relies on Auto Layout constraints, UIStackView, or manual frames. Constraints are powerful and precise, but complex screens can produce conflicting or ambiguous constraints that need careful debugging. Interface Builder offers visual layout editing. Many teams prefer programmatic layouts, though, because storyboard merges in version control can be painful.
Neither framework guarantees good design. A well-crafted interface comes from clear UX decisions and consistent design systems. Teams working with professional UI/UX design services will find that both frameworks can implement a polished design. SwiftUI is often quicker for standard components, and UIKit is easier to bend for highly custom ones.
State Management and Data Binding
SwiftUI treats state as the single source of truth. @State owns local values, @Binding passes write access down the hierarchy, and @Observable models let views track exactly the properties they read. SwiftUI pairs well with MVVM-style architectures, though many teams keep the architecture light because the framework already handles view-model synchronization.
UIKit traditionally leaves synchronization to the developer. Common patterns include delegation, target-action, notifications, key-value observing, and reactive frameworks such as Combine or RxSwift. These tools are mature. MVVM, MVC, VIPER, and coordinator patterns all work well with UIKit when applied consistently.
UIKit has also adopted Swift Observation. Starting with iOS 26, UIKit automatically tracks @Observable properties read in methods such as layoutSubviews() and the new updateProperties(), and updates views when those properties change. Apps can enable the same behavior on iOS 18 with an Info.plist key. This narrows the gap between the two frameworks, especially in apps that share models between UIKit and SwiftUI screens.
Performance and Responsiveness
Neither framework is universally faster. Real-world performance depends on the specific screens, implementation quality, OS version, and data volume.
SwiftUI performance depends on how much of the view hierarchy is re-evaluated when state changes. Well-structured code keeps updates narrow. Problems usually come from broad state dependencies, unstable view identity, or expensive work inside body. List, LazyVStack, and LazyVGrid load content on demand. SwiftUI’s performance characteristics have also changed across releases, so older benchmarks and complaints may not reflect current OS versions.
UIKit gives you explicit control. UITableView and UICollectionView reuse cells and support prefetching, and they handle very large data sets efficiently when implemented correctly. That control is also a responsibility. Excessive layout passes, heavy work on the main thread, and poor cell configuration slow UIKit apps down just as easily.
In both frameworks, memory issues such as retain cycles in closures appear in similar ways. The reliable approach is to measure. Profile with Instruments, including Time Profiler, the SwiftUI instrument, Allocations, and Leaks, and always test on real devices, especially older ones.
Animations and Customization
SwiftUI animations are state-driven. You wrap a state change in withAnimation { } or attach .animation(_:value:), and the framework interpolates between the old and new layouts. Transitions, matchedGeometryEffect, phase animators, and keyframe animators cover a wide range of effects with little code.
UIKit offers UIView.animate, UIViewPropertyAnimator for interruptible and scrubbable animations, custom view controller transitions, and direct access to Core Animation layers. When you need gesture-driven animations with exact timing control, custom drawing, or complex interactive transitions, UIKit’s lower-level control is often easier to work with. SwiftUI can handle many of these cases, but reaching fine-grained control sometimes means working against the framework’s defaults.
iOS Version Compatibility
SwiftUI requires iOS 13 or later. In practice, the usable feature set depends heavily on your deployment target. NavigationStack requires iOS 16, the @Observable macro requires iOS 17, and many newer modifiers and controls require more recent releases. A SwiftUI app targeting iOS 15 works with a noticeably smaller and older toolkit than one targeting the current release.
UIKit APIs also carry availability requirements, but the core framework works across every iOS version a modern app might target. Teams with users on older devices, or in enterprise environments that update slowly, often keep UIKit for that reason. Always check the minimum OS requirement for each API in Apple’s SwiftUI documentation before committing to a deployment target.
Development Speed and Learning Curve
For standard screens such as forms, lists, settings, and detail views, SwiftUI typically requires less code. Previews also shorten the edit-and-check cycle. That makes it strong for prototyping and for teams building reusable component libraries.
Speed depends heavily on the team, though. A developer with years of UIKit experience may move faster in UIKit than in SwiftUI, particularly when a screen needs behavior that SwiftUI doesn’t provide directly. SwiftUI’s syntax is easy to start with. Its data-flow rules, view identity, and update behavior take longer to master, and misunderstanding them causes subtle bugs.
Testing and Debugging
Both frameworks support unit tests with XCTest or Swift Testing, and UI tests through XCUITest. UI tests interact with the app through accessibility elements, so they work much the same either way. Business logic kept in models or view models is equally testable in both.
Debugging is where they differ. UIKit’s view hierarchy consists of concrete objects you can inspect with Xcode’s view debugger, breakpoints, and the lifecycle methods you control. SwiftUI’s views are descriptions rather than persistent objects, so the question “why did this view update?” can be harder to answer.
Instruments 26 includes a SwiftUI instrument with a Cause & Effect Graph that traces which state changes triggered which view updates. Developers also commonly use Self._printChanges(), an undocumented debugging helper, to log why a view’s body re-ran. Xcode Previews speed up visual checks, and since Xcode 15 the #Preview macro works for UIKit views and view controllers too. Accessibility Inspector works with both frameworks.
Can SwiftUI and UIKit Be Used Together?
Yes. SwiftUI and UIKit can coexist in the same app, and Apple provides official bridging APIs in both directions. A hybrid approach lets teams use SwiftUI where it speeds up development and keep UIKit where its control or existing code is valuable. Apple’s UIKit integration documentation describes the supported options.
Integrating UIKit Components Into SwiftUI
To use a UIKit view inside SwiftUI, conform a type to UIViewRepresentable. For a full view controller, use UIViewControllerRepresentable. You implement methods to create the UIKit object and to update it when SwiftUI state changes. A coordinator object handles delegate callbacks.
struct ActivityIndicator: UIViewRepresentable {
var isAnimating: Bool
func makeUIView(context: Context) -> UIActivityIndicatorView {
UIActivityIndicatorView(style: .large)
}
func updateUIView(_ uiView: UIActivityIndicatorView, context: Context) {
isAnimating ? uiView.startAnimating() : uiView.stopAnimating()
}
}
This is how teams reuse existing custom UIKit components, such as a chart view or a specialized media player, inside new SwiftUI screens.
Adding SwiftUI Views to UIKit Apps
UIHostingController wraps a SwiftUI view in a regular view controller. You can push, present, or embed it like any other controller:
let settingsVC = UIHostingController(rootView: SettingsView())
navigationController?.pushViewController(settingsVC, animated: true)
You can also add a hosting controller as a child view controller to place a SwiftUI component inside part of a UIKit screen. For list content, UIHostingConfiguration (iOS 16 and later) is Apple’s supported way to render SwiftUI views inside UICollectionView and UITableView cells.
Migrating From UIKit to SwiftUI
A full rewrite is rarely necessary and often risky. Incremental migration works better:
- Start with self-contained screens. Settings, onboarding, profile, and about screens have limited dependencies and clear boundaries.
- Keep shared models and services. Move business logic out of view controllers so both frameworks can use it. @Observable models now work well in both.
- Wrap what works. Keep complex, stable UIKit components and embed them through representables.
- Test at the boundaries. Navigation, keyboard handling, and safe-area behavior between hosting controllers and UIKit containers need regression testing.
For example, a UIKit e-commerce app might rebuild its account settings in SwiftUI first. Next, it could build a new loyalty feature entirely in SwiftUI. It could keep the heavily optimized product catalog and checkout flow in UIKit until there is a clear reason to change them.
How Does SwiftUI vs. UIKit Affect App Development Cost?
Framework choice affects how much effort a project takes, but it is only one factor among many. Features, backend work, design complexity, integrations, and quality assurance usually have a larger impact on total cost. For a broader view, see our guide to mobile app development cost.
Development Time and Complexity
SwiftUI can reduce effort for standard, state-driven screens, and reusable components compound that benefit over time. Highly custom interactions may take longer in SwiftUI if the team has to work around framework limitations or bridge to UIKit. The most important variable is team experience. Developers working in a framework they know well tend to estimate accurately and deliver predictably. Integration requirements and testing effort also matter, regardless of framework.
Maintenance and Long-Term Costs
For existing UIKit apps, the main cost question is migration: how much rewriting is justified, and how much regression testing it requires. For SwiftUI apps, the cost question is OS compatibility. Raising the deployment target unlocks better APIs but drops older devices, and annual OS releases can change framework behavior. Third-party dependencies, team skills, and code organization affect long-term maintenance far more than the framework alone. Planning these factors early is part of sound mobile app development, especially for apps expected to be maintained for years.
SwiftUI or UIKit: Which Should You Choose?
Base the decision on your project’s constraints rather than on which framework is newer:
- New app with a modern deployment target: Start with SwiftUI, and bring in UIKit only where specific components need it.
- Existing UIKit app: Keep UIKit as the foundation and adopt SwiftUI gradually for new or self-contained features.
- Must support older iOS versions: Lean on UIKit, or limit SwiftUI to APIs available at your minimum target.
- Highly custom interactions or complex layouts: Expect UIKit to play a significant role, at least for those screens.
- Team expertise: Choose the approach your team can build, debug, and maintain confidently, and plan training if you are changing direction.
- Long-term maintenance: Favor clean architecture and separation of business logic. That keeps future migration options open in either direction.
For most teams in practice, the answer is “SwiftUI first, UIKit where needed.” Projects with complex requirements or large legacy codebases benefit from an early technical assessment. Experienced iOS app development services can help evaluate deployment targets, existing code, and feature requirements before the framework decision gets locked in.
Table of Contents

Taha Mirza
Taha Hissam Mirza is a technology writer at The Apps Developers, covering mobile app development, web development, software engineering, and emerging technologies. He explores industry trends, development strategies, and practical solutions that help businesses make informed technology decisions. Through research-driven insights and easy-to-understand articles, Taha simplifies complex technical concepts and helps startups, entrepreneurs, and enterprises understand how to build scalable, secure, and user-friendly digital products.